Friday, March 28, 2014

Sorella Spotlight: BABY EDITION! Pretty Pushers Delivery Gowns...

As THE MOMENT gets closer, and by moment I mean actually having this baby, I can't help but start to obsess about the details of this unprecedented event.  I know, I know, as my mother says, "women have been squatting in fields for thousands of years (yeesh, mom...:))", this happens to be my first time and needless to say, I'm a little....apprehensive, shall we say?!?!

Anyhoo, anything that can make this blessed event just a little more blessed is on my radar right now.  My prenatal yoga class is a lifesaver (yoga works-Patricia Grube!), and we were recently introduced to Pretty Pushers Delivery Gowns. 

These Pretty Delivery Gowns come in all kinds of colors, and have the perfect openings for fetal monitors, epidural access, and medical assistance.  And they are WAY better than the scratchy hospital gowns:).  


SO! Mamas-to-be...let's stay comfortable and feel a little more ourselves in that hospital! Check out these gowns for your upcoming MOMENT.  They are only $29.99...so worth it!!

Have a lovely weekend!
Kacey

Thursday, March 27, 2014

Gwyneth+Conscious Uncoupling+Healthy Side Dish!

I have always had a little crush on Gwyneth Paltrow.  First came Shakespeare in Love, then she married Coldplay front man Chris Martin (!), and then I became a bit obsessed with her healthy lifestyle and her fabulous blog GOOP.  So imagine my surprise when I got my usual GOOP email on Tuesday, and I couldn't open it.....it said the server had crashed.  What?  I continued on making my other daily internet stops and I read that Gwyneth and Chris are "Consciously Uncoupling".......say what?? I guess announcing that news on your website would make it crash when you are Gwyneth Paltrow. 

Conscious Uncoupling......that's a new one......apparently they released the news while in the Caribbean......vacationing...... as a family. 
Huh......
So that must be what "consciously uncoupling" looks like. 
Ok then.  :)

So anyway.......in lieu of the news of their "uncoupling",  I thought it was the perfect time to share my absolute favorite recipe from her It's All Good cookbook.  :)


Roasted Cauliflower + Chickpeas with Mustard+Parsley

Ingredients
14oz can of chickpeas, rinsed and drained and dried with a kitchen towel
1 head of cauliflower cut into bite-sized pieces
extra virgin olive oil
sea salt
1 tablespoon Dijon Mustard
1 tablespoon seeded mustard
1 tablespoon of white wine vinegar (I used red wine vinegar-all I had on hand)
freshly ground pepper
1/4 cup chopped Italian Parsley (I didn't have this so I didn't add)

Preheat the oven to 400 degrees with the rack in the middle.  Toss the Chickpeas and Cauliflower with 3 tablespoons of olive oil and a big pinch of salt. Roast veggies for about 45 minutes stirring around occasionally until veggies are a golden/dark brown and cauliflower is soft. 

While veggies are roasting mix together the mustards, vinegar and 1/4 cup of olive oil with another big pinch of salt and a few grinds of black pepper. While the veggies are still warm toss them with the mustard dressing and parsley. 
You can serve warm or at room temperature. 


This is seriously delicious, and even the husband loved it. 
If you are looking for a healthy side dish I absolutely recommend this. So yummy!

xo,
Kara

Wednesday, March 26, 2014

DIY Stamped "EAT" Napkins


These "EAT" napkins are just adorable, and once again, super easy to make.  

DIY Stamped "EAT" Napkins
Plain white cloth napkins
Rubber stamps
ink pad in color of your choice
decorative ribbon
pins or hot glue

1.) Fold the napkin the way you'll want it showing when it's sitting on each plate.

2.) Carefully stamp "E" "A" "T" on the bottom of the napkin.

3.) Tie decorative lace ribbon around the napkin.  Layer it with another contrasting piece of ribbon.

4.)  Secure the ribbon in the back by either using a small pin or by hot gluing it together.


I paired the "EAT" napkins with these seersucker ones to create dimension and interest on the table.  They were a huge hit! So cute - and you can be as creative as you want with these.  Use different color cloth napkins, play around with wording! Options are endless ;-)

xo,
Kate, Kara, and Kacey


Photos by Rachel Moore Photography

FUN news!  Our DIY Bell Send of Wands was featured on The DIY Dreamer!

The DIY Dreamer

Go check it out!

Linking to:

Tuesday, March 25, 2014

BABY room Update!

Time for a BABY ROOM update!

I've been assembling pieces from all over the South Bay (and Etsy:)) for this little lady's room. (slash workout room, slash office).  

Remember my inspiration blog for the nursery?

Since then, here is what I've got goin'...

Number 1: The Crib!


We are in love with this crib so far! It was so easy to put together, the grey is PERFECT in the room, and it's streamlined and not too big for a small nursery.

Number 2: Driftwood Rods!


I wish we had access and time for foraging for our own driftwood.  Very possible if you have access to rivers, beaches.  BUT when in doubt...there is always ETSY!  Can't wait to get these rods up and have some fun decorating!

Number 3: Star Decals! 


I'm waiting to get our Blush and Ivory Decals to put above the crib on all that empty wall space. Stay tuned!

Number 4: Shelving!


These Ikea Floating Shelves were $7.99!  I cannot WAIT to DIY them up with paint, stain, leafing, who knows?!?  

Number 5: Ivory Sheepskin Rug!


So this Ikea Faux Ivory Sheepskin Rug was $9.99.  It was almost identical to the real ones they have for $29.99.  I went with the money saver!

Number 6: Lighting!


We chose this Pottery Barn Capiz Flower Pendant to hang as well.  I can't wait for it to arrive!

And finally Number 7: Mirror Rehab!

Here is the mirror we have hanging now: 


It's a little dark and heavy for the room right now.  

Here is what I saw antiquing the other day and got INSPIRED!!


Phew.  That's what's going on in my house these days...LOTS of projects to DIY in the next few weeks!

Wish me luck, let me know if you have any tips or tricks as I go on this adventure!!
Love!
Kacey


Monday, March 24, 2014

Insalata Mista with Grilled Chicken Breast


Spring is upon us!  Even if it's not quite showing it's warmth yet - let's coax it on in with a fresh, spring-like salad, shall we?  This is one of my favorites.  Insalata Mista means mixed salad in Italian.  You can use whatever veggies you want.  The key is to use the freshest ingredients possible. Wash them early so they have time to dry off, and don't put them in the refrigerator (until after you've used what you need for the meal.)

We steamed a couple of artichokes to munch on before dinner.  Then I melted butter with some Italian herbs and mixed up some mayo with Italian salad dressing for 2 different and tasty dips. Be sure to save  the hearts to put in the salad.

Insalata Mista
Serves 4
Arugula
2 Artichoke hearts, sliced 
2 Tomatoes, cut in quarters
8 oz Oyster or trumpet mushrooms
Leafy greens
1 bunch of Asparagus
Fresh Parmesan, shaved
4 Organic chicken breasts
fresh rosemary
salt and pepper
extra virgin olive oil

1.) Roast the asparagus.  Heat oven to 400 degrees. Drizzle trimmed stalks with 
olive oil and salt. Place in oven and roast for about 10 minutes.  

2.) Mix together the arugula, leafy greens, sliced mushrooms and asparagus.

3.) Thinly slice the saved artichoke hearts and toss in salad.

4.) Shave fresh Parmesan on top.  

5.) Dish out salad equally among plates.  Place sliced tomatoes along the edge of the plate.

Grilled Chicken Breasts
I grabbed some rosemary from our rosemary bush out back and infused extra virgin olive oil with it for a few hours.  I brushed the rosemary/oil over the chicken breasts and seasoned them with a little salt and pepper.  Then we grilled them up on the outside grill.  Slice up the meat, and divide among salads.

Dressing
1/2 cup Extra Virgin Olive Oil
1/4 Cup fresh lemon juice
Salt and Pepper

1.) Whisk together the extra virgin olive oil and fresh squeezed lemon juice. 
Add salt and pepper to taste. Drizzle dressing all over salad and tomatoes.


I picked up fresh baked bread from the Italian restaurant down the street.  It's brushed with olive oil, garlic, and herbs de provence.

This meal pairs perfectly with a crisp, white wine - Roero Arneis is a great choice. 


And why not top off the night with espressos on the porch...

Cheers!
Kate


Linking To:
The Chicken Chick
Creatively Living

Friday, March 21, 2014

DIY: Bell Send Off Wands


DIY projects are my happy place.  And when I successfully create a project that turns out lovely, yet is super simple to make?! Well call me doubly happy.  These Bell Wands are both lovely and easy to make.  I originally made them to use as Send Off Wands for the happy couple at the end of their wedding party.  However, these wands can be so much more than that! Make them with kids, use them in floral arrangements, spice them up with pretty ribbons for whatever holiday is coming up!

DIY Bell Send-Off Wands
Wooden dowels 
ribbon in colors of your choice,
mini silver jingle bells
OPTIONAL: Paint for dowels

2.)  Cut ribbon to size you want (length of dowel is good) and string on 2 or 3 bells.
3.)  Push bells close together on ribbon. 
4.)  Tie ribbon with bells on dowel.
5.)  Tie on any other ribbons you want to add color.
6.)  Hand out to your kids or guests!

**If you want to paint the wooden dowels to compliment your 
occasion, go right ahead! Do this first before you tie on ribbons.


This is such a fun and whimsical alternative to rice, bubbles, or lavender for a wedding send off.   And it is a great project to do with kids - magic wands anyone?

xo,
Kate


This photo shoot was featured and published on Love and Lavender.


Wednesday, March 19, 2014

Chicken, Pesto, and Mozzarella Paninis

So now that I have my fresh pesto made (see yesterday's easy recipe!), I'm ready to make these delicious Chicken, Pesto, and Mozzarella Paninis.

I recommend getting yourself a Panini press.  There are a lot of affordable options out there, and they take your sandwich skills up a notch - Panini is so much fancier then toasted, right?  I use the Cuisinart Griddler Panini and Sandwich Press.  However, if you don't have a panini press - don't despair! These would be just as delicious with the bread toasted in a toaster.

Chicken, Pesto and Mozzarella Panini
Grilled or baked (organic!) chicken*
Fresh Basil Pesto
8 oz ball of mozzarella
fresh Italian bread
arugula
sliced tomato (optional)

1.) Slice your grilled or baked chicken into thin slices.
2.) Slice mozzarella ball into thin slices.
3.) Assemble sandwich: Spread fresh pesto on 2 pieces of Italian crusty bread.
Layer on sliced chicken, mozzarella, tomato, and arugula.
4.) Place in panini press and lower top.
5.) Periodically check on sandwich....remove sandwich when cheese is melted and 
grill lines look dark, but not burned.


*Easy baked chicken:
Season 2 breasts with garlic salt and tony chachere's seasoning.
Pre-heat oven to 375 degrees.
Cover chicken with foil and bake for 30 minutes.
Remove foil and bake for another 15 minutes.


Tuesday, March 18, 2014

Fresh Basil Pesto


Fresh pesto is one of my favorite springtime and especially summertime recipes.  Made with home grown basil straight out of the garden? Delish!  As we are all coming down off of the St. Paddy's day high, I thought we could usher in almost Spring with some fresh pesto. Store bought basil will do the trick until your fresh basil grows a little bigger in the garden.

This pesto goes great on paninis, crostinis - basically anything ending in "ini" :)  This recipe is simple and so much tastier than store bought pesto.  It makes quite a bit, so be sure to freeze left over pesto in ice cube trays.  Then you can pop them out whenever you want to whip up a quick batch of Pesto Chicken Pasta, or make Chicken, mozzarella and pesto paninis  (check back tomorrow for that recipe!)

xo,
Kate, Kara, and Kacey

Fresh Basil Pesto
2 cups fresh basil leaves (packed)
1/3 cup pine nuts
1/2 cup shredded parmesan cheese or parmesan reggiano
1/2 cup Extra Virgin Olive Oil
3 medium garlic cloves, minced
Salt and freshly ground pepper

1.  Using a food processor, combine the basil and pine nuts. 
2.) Add garlic and pulse
3.) With the food processor running, slowly drizzle in the olive oil.
4.) Stop and scrape the sides of the bowl, then add the cheese and pulse.
5.) Toss in salt and pepper to taste and pulse to desired final consistency.


Linking to:

Friday, March 14, 2014

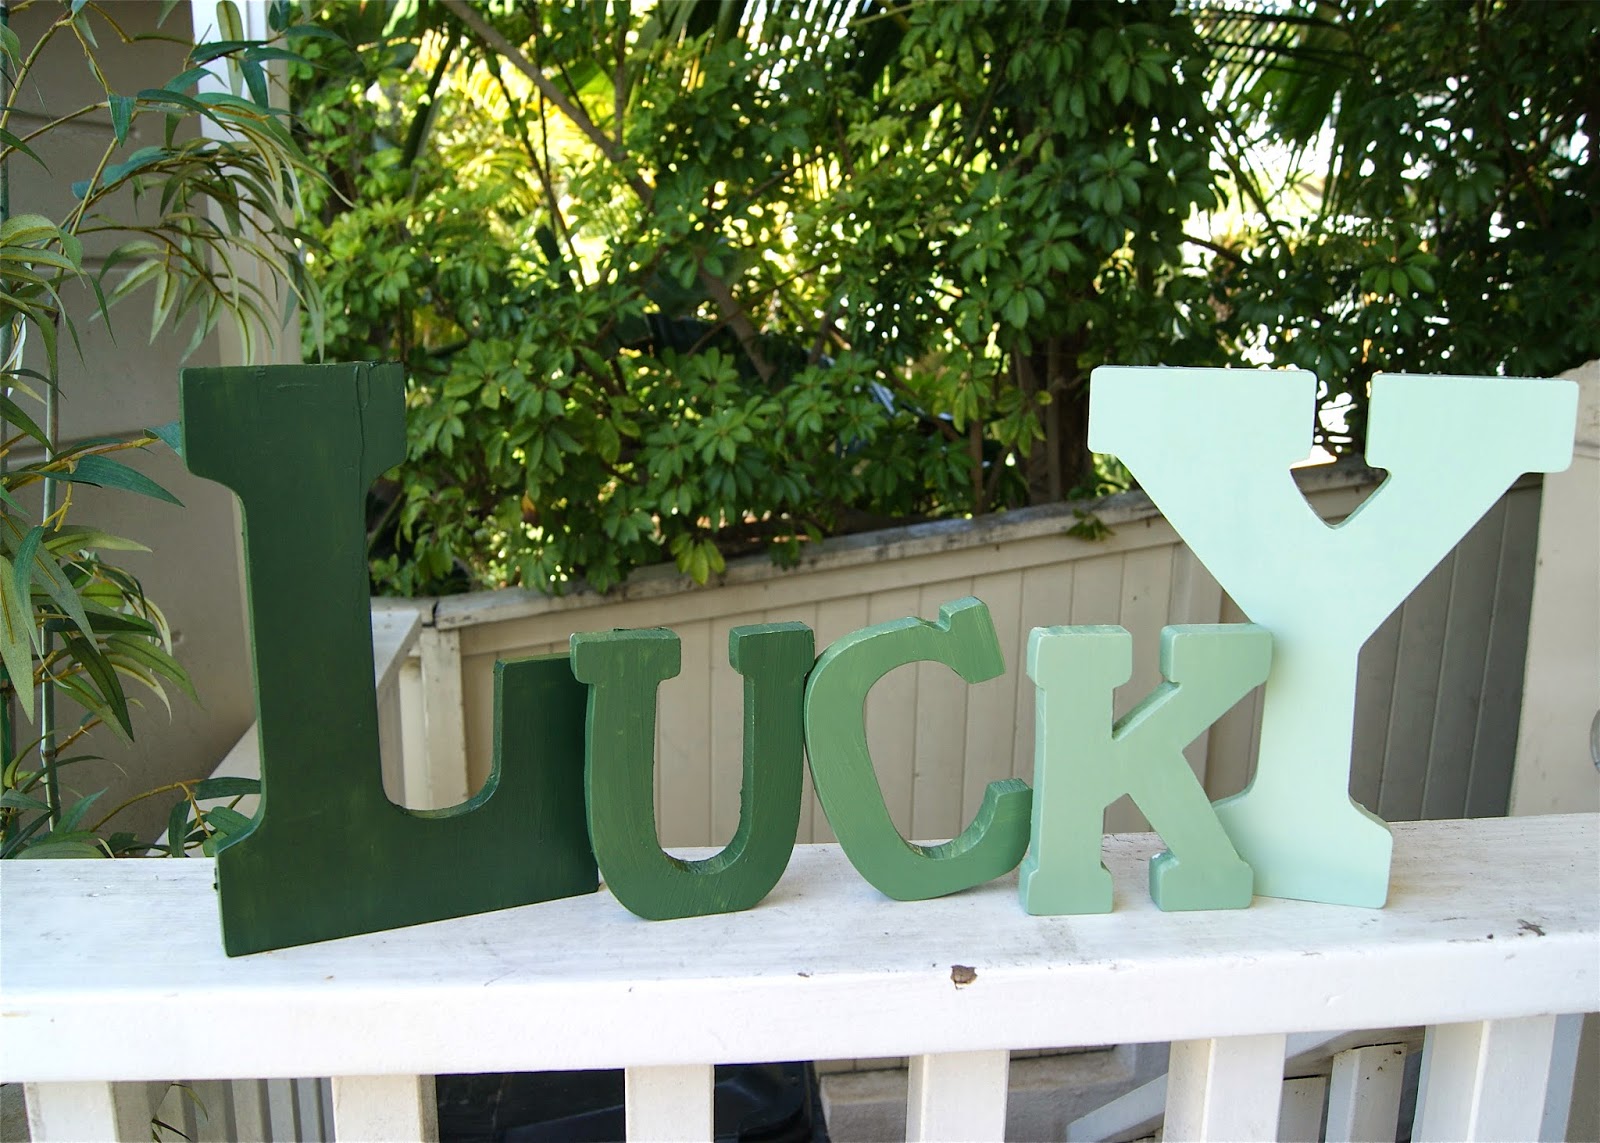
St. Patty's Day O'FUN!!! Ombre "Lucky" Sign


Who doesn't looooove a good holiday project??

I gotta be honest, I was having some trouble coming up with a fun St. Patrick's day project.  I didn't want shamrocks and pots of gold this year...just something classy, vintage-y, and fun to spruce up my house and invite the Luck O' The Irish in:)

(Side note: did you know that St. Patrick's Day is an official Christian holiday celebrating the arrival of Christianity in Ireland?  It always falls during Lent, and the Church lifts the restrictions on eating and drinking alcohol for this one day! Hence the fun filled, green beer obsessed holiday that it has now become...).

Anyhoo, I finally got inspired on a random trip to Michaels as I was meandering down the wood and paint aisle. Recently I had seen these cool ombre candlesticks online and...

EUREKA!  I knew what I wanted to do this year!

Ombre "LUCKY" letters!!  A fun little vignette to put up in the house...it's  pretty and reminds me of how "lucky" and blessed I am everyday:)  I thought adding the ombre look would spice it up a bit from just all one green color.  


SO.  I found the perfect wooden letters that would stand up on their own.  I chose a big L and Y to whimsy it up a bit.


I laid out the letters at home, along with the dark green and white all purpose paint I decided on.


There are a ton of greens and types of paint to choose from...It's up to you how dark you want to start your letters.


Then I started painting!  I used the darkest green on the 'L'.  A plastic bowl was perfect to hold the paint as I slowly added dollops of white to the green color to lighten it up.  A little white goes a long way, but it's trial and error to find the perfect ascending shades of green that you want for your sign.


I think the K could be just a scosh darker after I saw the final dried finish. I'll have to do that next time! 

This project was less than $20, and it was so much fun to get my hands dirty with some good old fashioned painting!  Like being a kid again!  I will DEFINITELY have to do a project like this with my daughter some day:)


Happy Irish Day!!
Kacey

Thursday, March 13, 2014

Spotlight: Striped Maternity Style

Oh, there's nothing like carrying around a little extra weight.  We've all been there.  What's new this time around is that extra weight is an actual human being.  Yay for maternity style (insert grimace/smile here)!

I've had to really embrace my inner Earth Mama and get on board with buying maternity clothes.  I tried to hold out and wear my old stuff (aka baggiest clothes) for as long as I could.  But reality eventually set in, and I realized I had to go buy some actual maternity clothing.

So off I trooped to Destination Maternity.  Shall I show you one of my favorite purchases? I think I shall :)

Ladies, you have to buy this 3/4 Sleeve Scoop Neck Side Ruched Top!  It fits great, is long enough to cover anything that needs covering, and is very comfortable.  I have it in every color, and I would wear it everyday if I could!  I'm pretty sure I'll continue wearing these when I'm not pregnant, too!


Pefect for work:
Selfie!

Perfect for date night:


See? I wear it a lot :)

xo,

Wednesday, March 12, 2014

Gramma's Chicken Piccata


Chicken has been feeling so boring and played out to me lately, so I decided I would try something new and different.  I have had my Gramma's Chicken Piccata recipe for years, and thought I should give it a whirl.

I love that I have a recipe or two that my Gramma Gilbert wrote for me.  It makes it special to see her handwriting and know I am making a recipe that she loved too. She was such an amazing cook, and while she doesn't cook anymore, I still have some favorite dishes that she has taught us how to make.  One of my favorites was her chokecherry jelly. You can check out our attempt at jelly here.

I made just a few changes to this recipe. 
Enjoy~

Ingredients
1 to 1 and a half pounds of chicken breasts
Flour-enough for coating the chicken
3 TBS of butter
Juice of 1 lemon
2 cups of low sodium chicken broth
1 small jar of Capers- the amount you use can vary based on how much you LOVE capers. if you are like me you will use 3 big spoonfuls
salt and pepper


Start by pounding chicken to a uniform thickness of about 1 inch thick.  Salt and Pepper the chicken to your liking and then coat both sides with flour.  Melt butter in the skillet on medium/high heat and then brown chicken. 

Remove the chicken from the skillet and add lemon juice and chicken broth to the skillet. Boil down to about half a cup. I didn't measure this, but rather judged the amount based on the thickness of the broth. 

Place chicken back in the skillet with the capers and cook another 3 to 5 minutes.

Serve and enjoy!


I chose to make a very basic pasta to serve on the side- whole wheat penne, olive oil, basil and parm.  The light flavor blended perfectly with the Chicken Piccata.

xo,
Kara


Tuesday, March 11, 2014

DIY: Fabric Flower Wreath


After making these fabric flowers (Kate posted this DIY last Friday, check it out!) we wanted to take it to the next level and make a fun and easy spring wreath. 

These flowers are super easy to make, and if I think that, well then they must be easy! Let's get started...

 My new glue gun......


Coffee and felt cutting......


A couple flowers completed.....


This wreath cost me a total of $10.00 dollars to make and I love it! I know I would have spent a lot more on a wreath from Crate and Barrel (a weakness of mine!) 

Supplies Needed:
*1 grapevine wreath
*squares of felt in whatever colors you desire
*Glue gun and glue sticks :-)
*Scissors
*Satin ribbon for bow on top

Instructions:
*assemble flowers per tutorial link above
*glue flowers onto wreath in whatever position is your fav
*tie satin bow at length you wish your wreath to hang
*display your fabulous new wreath!


If I can do it.....you can do it!!


Happy Crafting!
xo,

Monday, March 10, 2014

Delicious Deviled Eggs


I'm a sucker for a great deviled egg.  I love how pretty they look all gathered together...spring colors of yellow and white and orange sprinkled on top! And they are just so darn tasty, too.  I can pop these things in like m and m's.  Seriously.  If you want one, you have to move fast.

A lot of events are coming up that may require the perfect deviled eggs...Easter, Baby showers, spring brunches, Mother's Day!  Deviled eggs are a fab addition to any brunch meal.

Deeeee-lish!

Delicious Deviled Eggs 
(made with 1 dozen eggs)

1.) Hard boil 12 eggs.  

2.)  Once cool, peel all the eggs.  

3.) Gently slice the eggs in half lengthwise. Scoop out the yoke,
and set aside in a bowl.

4.) Add to yokes 2 heaping tablespoons of Yellow Mustard, 
2 heaping tablespoons of Light Mayo,
1 heaping tablespoon of Light Ranch Dressing, 
and a splash of Italian Salad Dressing (optional).
Mix together.

5.) Spoon the mixture into a small plastic Ziploc bag. With scissors, 
snip off a small corner of the bag. Squeeze the deviled egg mix 
into each waiting egg half.

6.) Sprinkle with Paprika.

***WARNING: I should have taken 24 little deviled eggs over to a recent event I attended.
Ahem.  Only 20 went over.  Oops.***


xo,
Kate, Kara, and Kacey